
I’ve been on a mission for months looking for an under-desk keyboard tray that was functional and aesthetically pleasing.
Disclaimer: Please be advised that this blog may feature affiliate links, whereby the act of clicking on product links and subsequently making a purchase could result in the site owner earning a nominal commission.
I found that Amazon sells under-desk trays that fit a keyboard+mouse that are in the $30-$70 price range but were lacking the aesthetics and the space that I wanted. I knew that the only way to get what I want was to do another DIY.
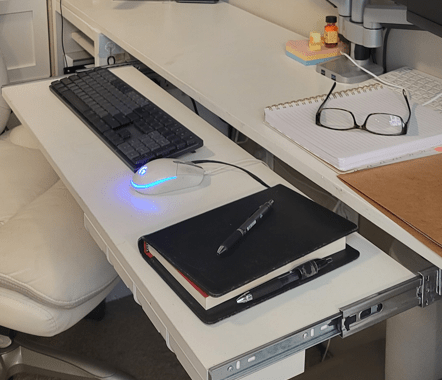
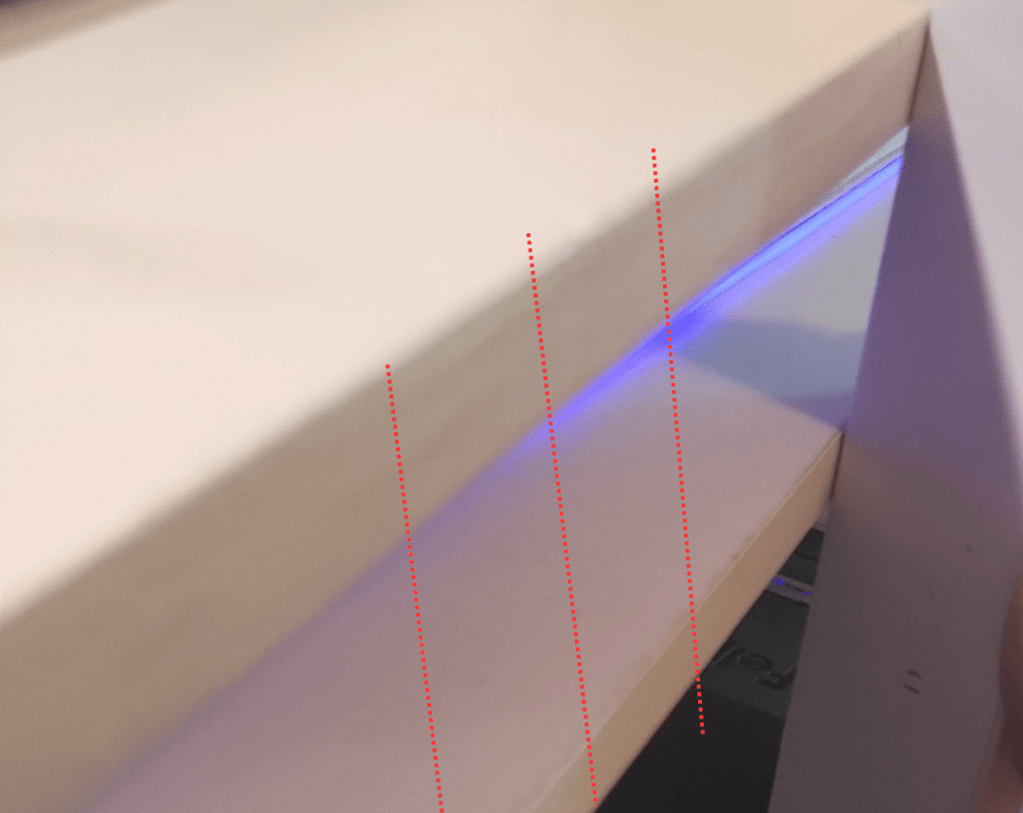
My entire workspace setup is a DIY. There isn’t much space on the main upper deskboard as you can see from the image below which is why I wanted to do more to get more of that space that I wanted. The desktop itself is a 15″wide 10′ long hardwood board scrap that I cut down to 7 feet with a mini circular saw, which I then sanded and painted white. Supporting each side of the desktop board are two Closet Maid 2-cube organizers.
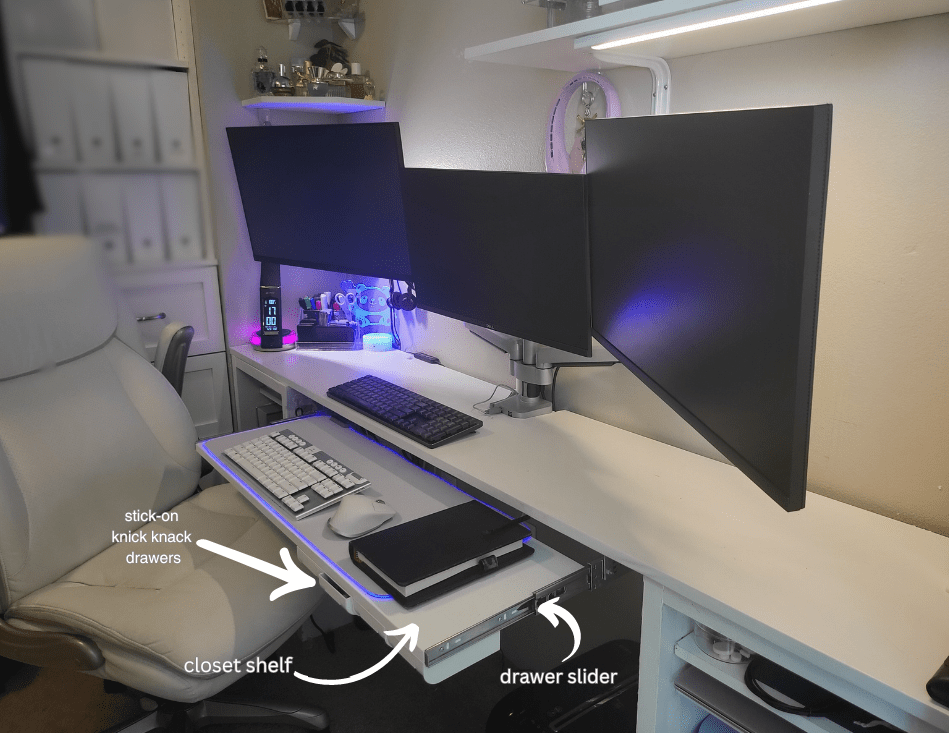
So basically, I added a bottom shelf that slides in and out quietly, then affixed little stick-on knick-knack drawers on the underside that you can get from Amazon or a dollar store.
You too can increase your home-office desktop real estate with a closet shelf, some L-Brackets and a pair of drawer sliders.
WHAT YOU’LL NEED
MATERIALS
- 1x – Closet shelf (Available in 12″-14″ wide). You can get these shelf boards from Amazon, the nearest home depot, or use a basic wood board cut down to the preferred length. I used a 36″W x 12″L Closet Maid laminate wooden shelf board.
- 1x – Heavy Duty Drawer Slider set, (Available in multiple lengths). The heavy-duty drawer slides have ball bearings and can hold more weight, are very sturdy, quiet, and can be fully extended. I used the heavy duty 12″ slides. The typical standard epoxy-coated slides are a little easier on the budget but have limitations — it might make the shelf fall out when fully extended, are a tad noisy, and less sturdy.
- 4x – L-Brackets (opt for 2″ – 3″ size). With the 2″ size, you get less gap between the main deskboard and the under shelf-board. I initially tried the 2″ bracket but that did not allow the standard-height keyboards to fit, neither did it provide allowance for my thick writing pad and other things. I switched to the 3″ which I thought was perfect.
TOOLS
- 1x – Phillips Screwdriver. I use the Ryobi Electric Swivel-Handle Screwdriver for all my woodworking DIY projects and makes putting things together so much faster.
- 1x – Drill – I prefer to use the heavy duty types. Dewalt is my personal preference when it comes to doing frequent DIY wood work projects.
- 1x – Pencil
- 1x – Measuring Tape
- 1x – Bolt cutter
INSTRUCTIONS:
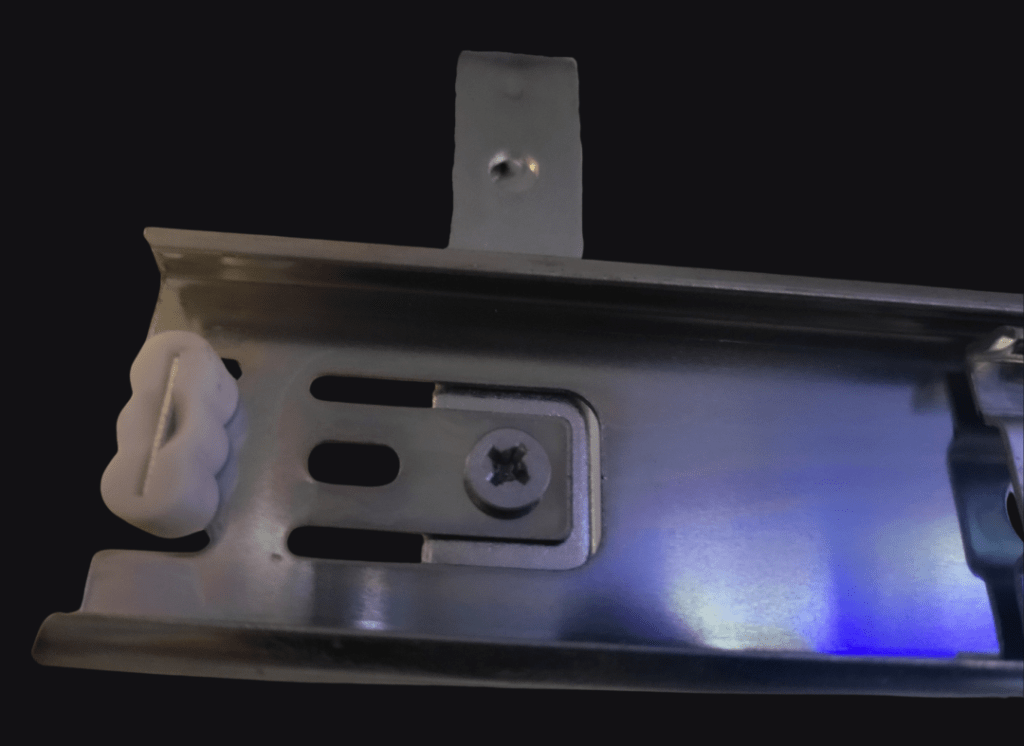
STEP 1: Mount slider to shelf board
Take apart the drawer slides so that you have two pieces. Mount the smaller piece onto each side of the shelf board. Follow the mounting instructions that came with the packaging.
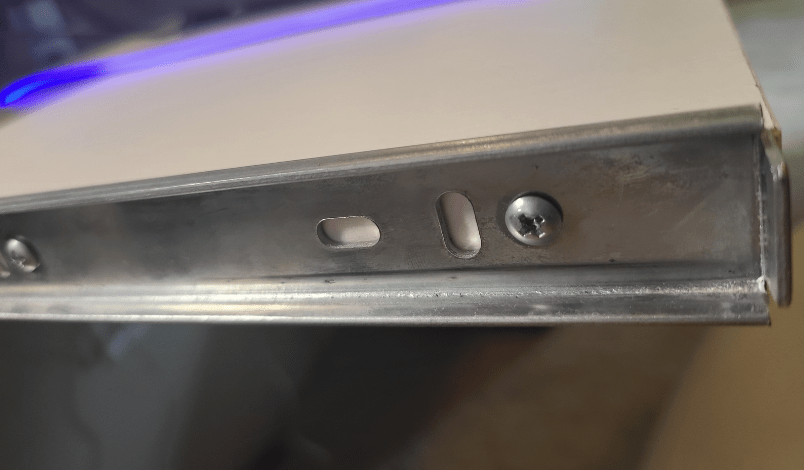
STEP 2: Mount L-brackets to slider
Mount the L-Brackets to the drawer slide as shown in the picture below (the head of the screw should be on the inside, the thread-bar and hex [nut]facing out.).
You can have your L-bracket facing in or out. In the picture below, you’ll see that I chose to mount mine with the L-angle facing out since I had enough space on the left and right sides of the shelf to do so.
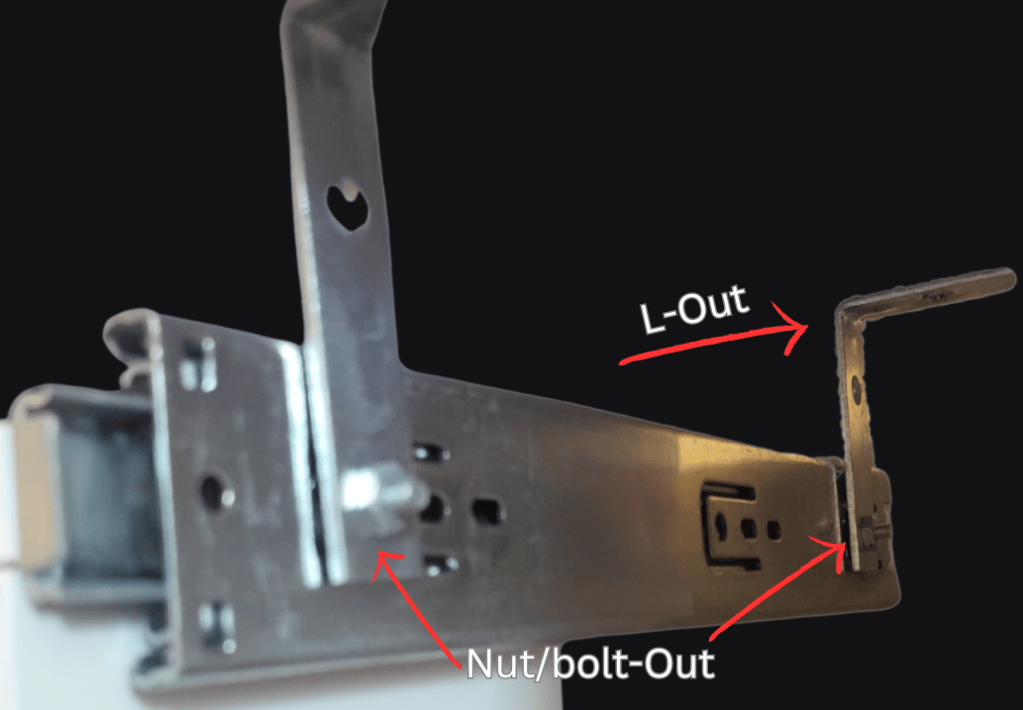
Tip: If your screw extends out too much, use a bolt cutter (or hacksaw for metal) to trim it down.
STEP 3: Complete The Installation
Re-attach the larger piece of the drawer slides to the smaller pieces on both sides of the shelf. Then with the help of another person, chair, or small step ladder, position the entire tray under the desk such that the shelf board and main deskboard are flushed at the front. My under desk shelf sits a few centimeter’s behind the front part of the main deskboard.
You may need to add more things to the chair/step ladder to prop the tray as high up so that the L-bracket touches the underside of the desk. Step back and check to see if the tray is centered/positioned the way you want it, reposition as needed.
Use a pencil to color in the holes where the L bracket meets the main deskboard then drill a pilot-hole in the center of each hole. Finally affix all your screws using your electric screwdriver.
You are done!

![Travel Bliss: Japan [Leg 2 of 2]](https://theblisscomplex.com/wp-content/uploads/2025/10/pexels-photo-8828614.jpeg?w=1024)


Leave a comment